How to migrate an Outsystems project to another Environment?
Who has ever tried to migrate a project developed in one environment to another in Outsystems and encountered the Intellectual Property error? Shall we try to solve this? In this article, I’ll detail how I usually go about it when I want to take a project I developed in one personal environment and continue evolving the project in another personal environment.
In my case, when do I usually do this?
- When a Personal environment is already full and I can no longer evolve it due to the 2GB limit that is almost reached.
- When I finish a project and want to use it for a longer period in a clean environment with more space.
Outsystems Intellectual Property Protection – IPP
Each OutSystems subscription has a unique Activation Code that identifies the infrastructure, which is the term used for the software running the development platform and the runtime environments that are licensed through your subscription. Each runtime environment has a unique Serial Number that identifies it.

Given this, it is important to know that to take the project to another environment we need permission from the Source environment, which may or may not be granted. This is done in the IPP Portal.
Therefore, in some cases, after submitting your application through the IPP Portal, you get an email with the following message: “The IP rights of your applications could not be granted”.
This means you’re trying to change the activation code of an application that is IPP-protected. The infrastructure where that application was created doesn’t allow applications to be published on the target infrastructure selected.
STEP BY STEP
Now without further ado, let’s simulate a migration here in which we will give this permission and finally take our project to another Personal. Choose a project of yours that you want to migrate and follow the steps I will give in my example project:
- Project: Roles and Permissions
- Source Personal Environment:
- carlos-victor.outsystemscloud.com
- E-mail: contato@agenciadewebsites.com.br
- Destination Personal Environment:
Step 1
Download your project, preferably with the .oap extension (this download can be carried out in the environment where we create the modules of an Outsystems application, as shown in the image below).
Step 2
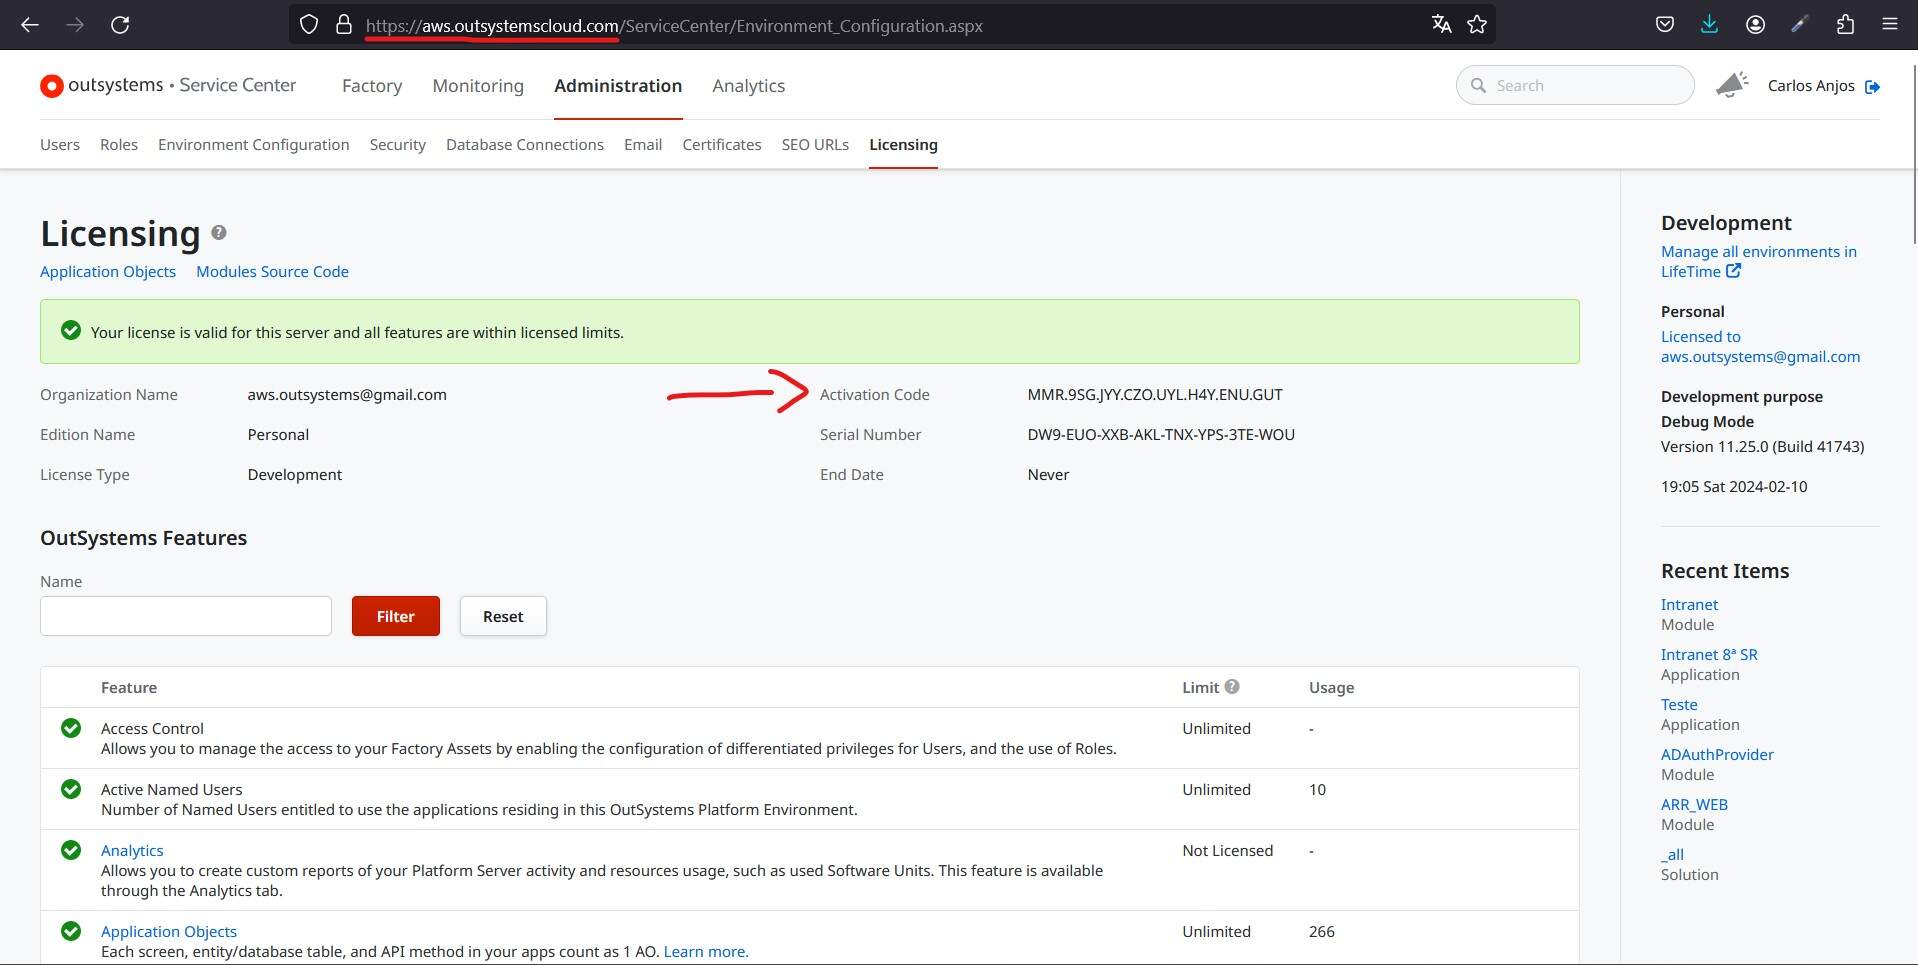
Access the Service Center of the DESTINATION environment and note the activation code found in Administration / Licensing.
Step 3
The time has come for the
Source to give permission to the
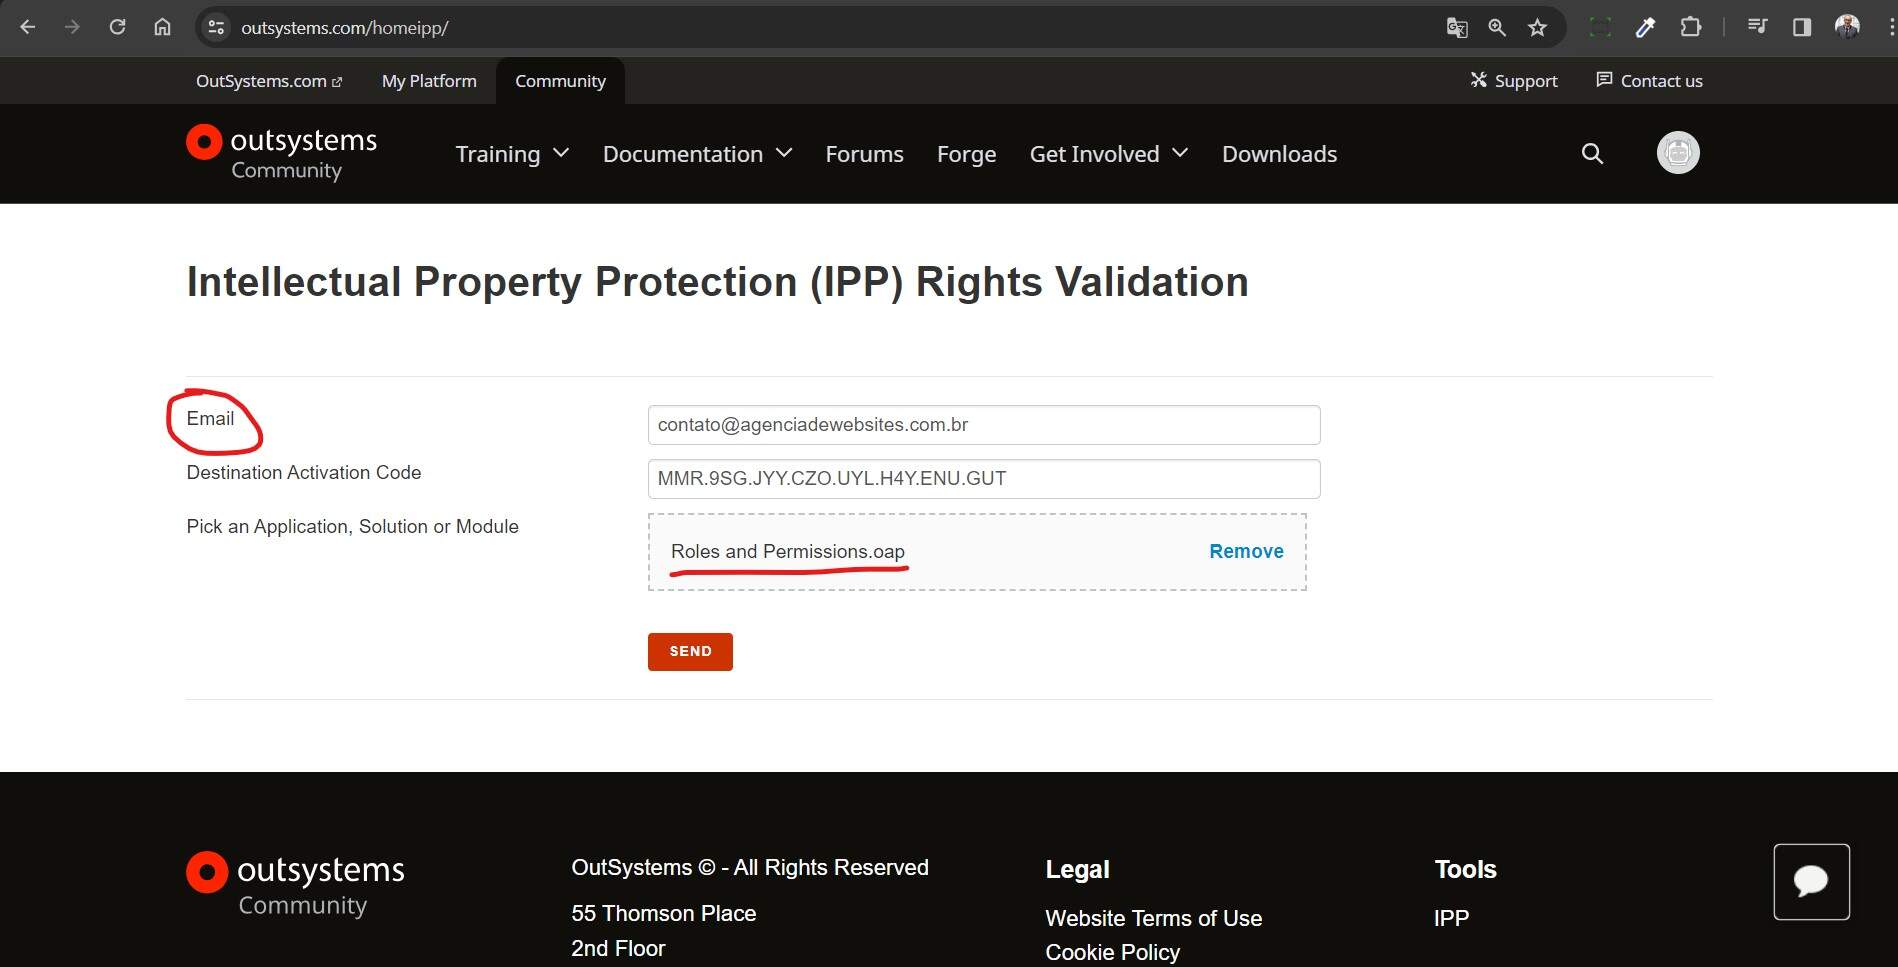
Destination to install the application. Therefore, log in to the Outsystems website
https://www.outsystems.com/Login with your
Source account.
After that, access the address below:
Note 1: When you open this link, confirm that you are logged in with the Source account. In other words, the Source email should appear since your project is still in the source and it is the source that must allow the destination environment to install the application.
Note 2: The destination Activation Code is located in the Service Center (Administrator/Licensing). Note that the activation code must be from the DESTINATION environment, not the source, as shown in step 2.
Step 4
An email will be sent with the project for download without IPP protection. Note: the download and completion of the process must be done within a maximum of 3 days:
Processing Intellectual Property Rights!
contato@agenciadewebsites.com.br will receive an email with the download link shortly. You can then download and deploy the application into the target OutSystems Platform Infrastructure. If the IPP can’t be removed, you will receive an email with further details.This link will remain available for the next 3 days after the e-mail has been sent. If you wish you can also upload another file.
Download the file that arrived in the email with our authorized project and save it to a directory.
Step 5
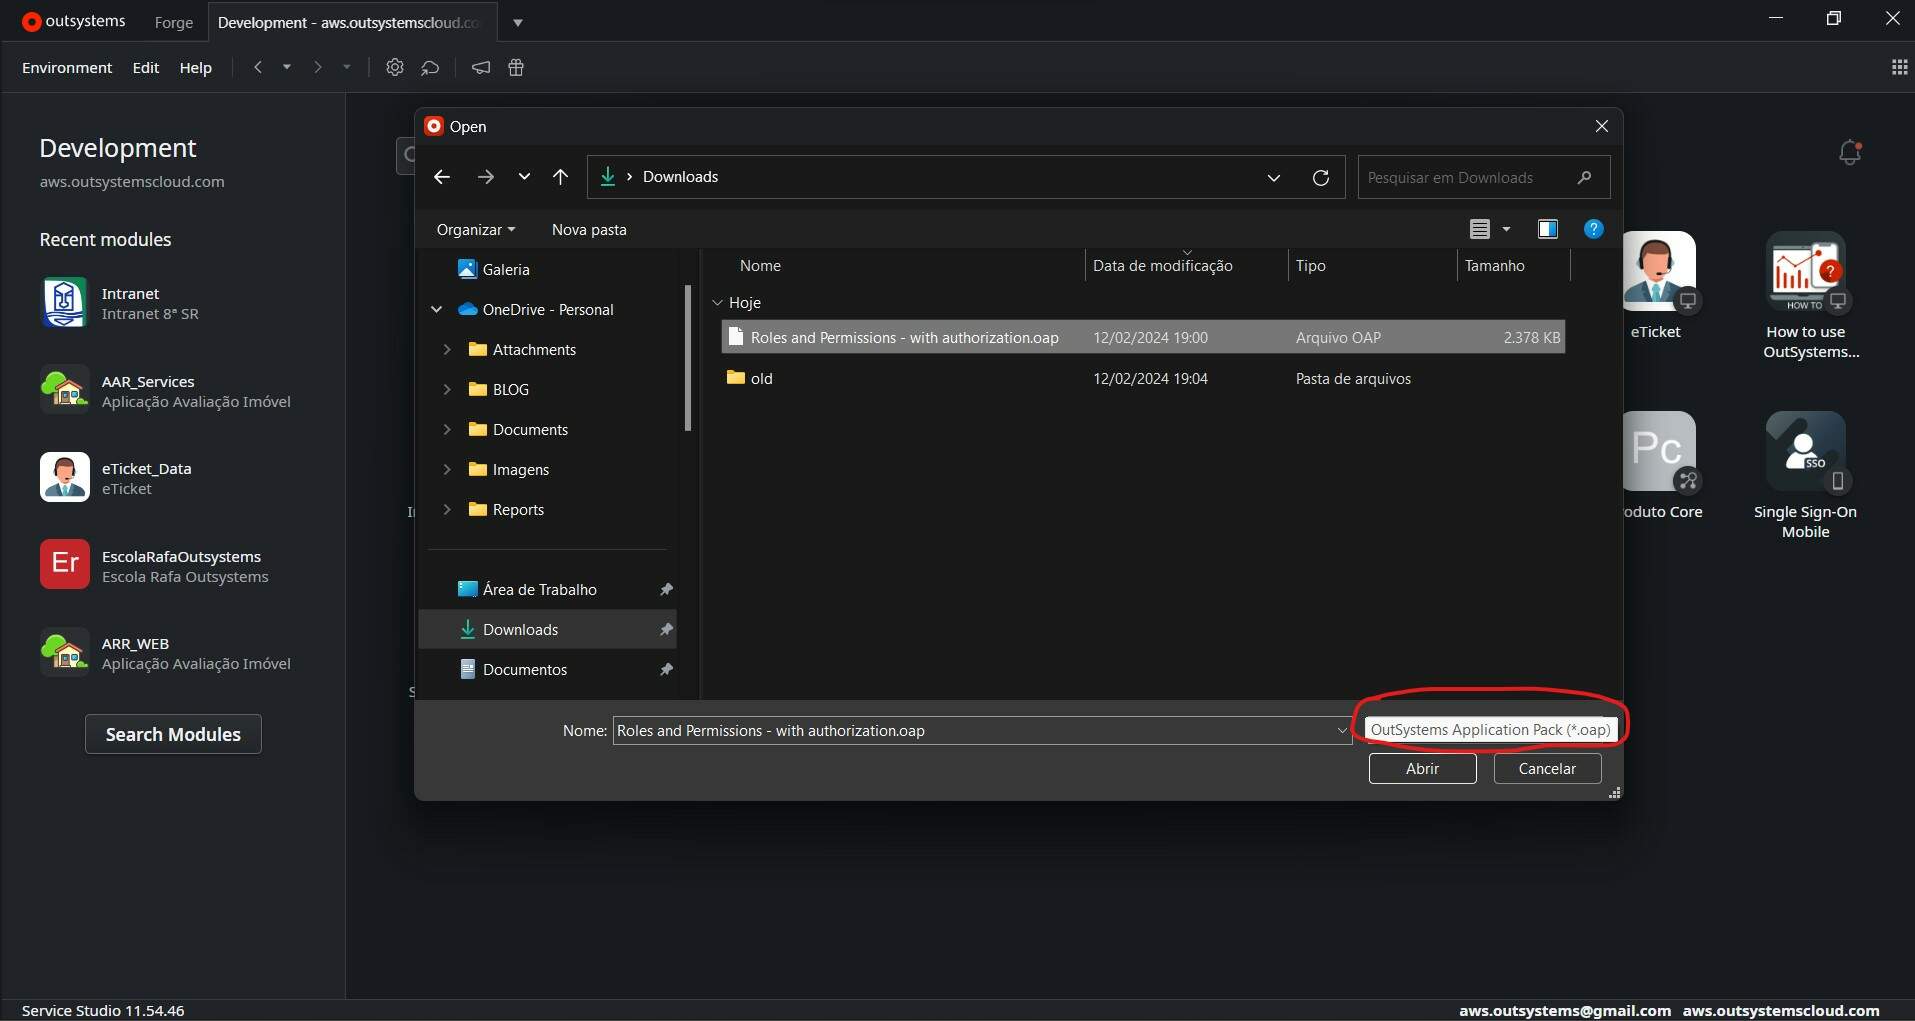
After completing the above step, simply open the NEW Environment and click on Environment / Open Files. Note: if the file type is not .OAP, change the type to .oap (OutSystems Application Pack).
As you can see, it’s important to select the .OAP type to be able to select our project without restrictions that we just downloaded via email.
Step 6
It’s time to install our project

At this stage, our project will be installed without any issues, as the Source has given us permission to install it in the Destination environment.
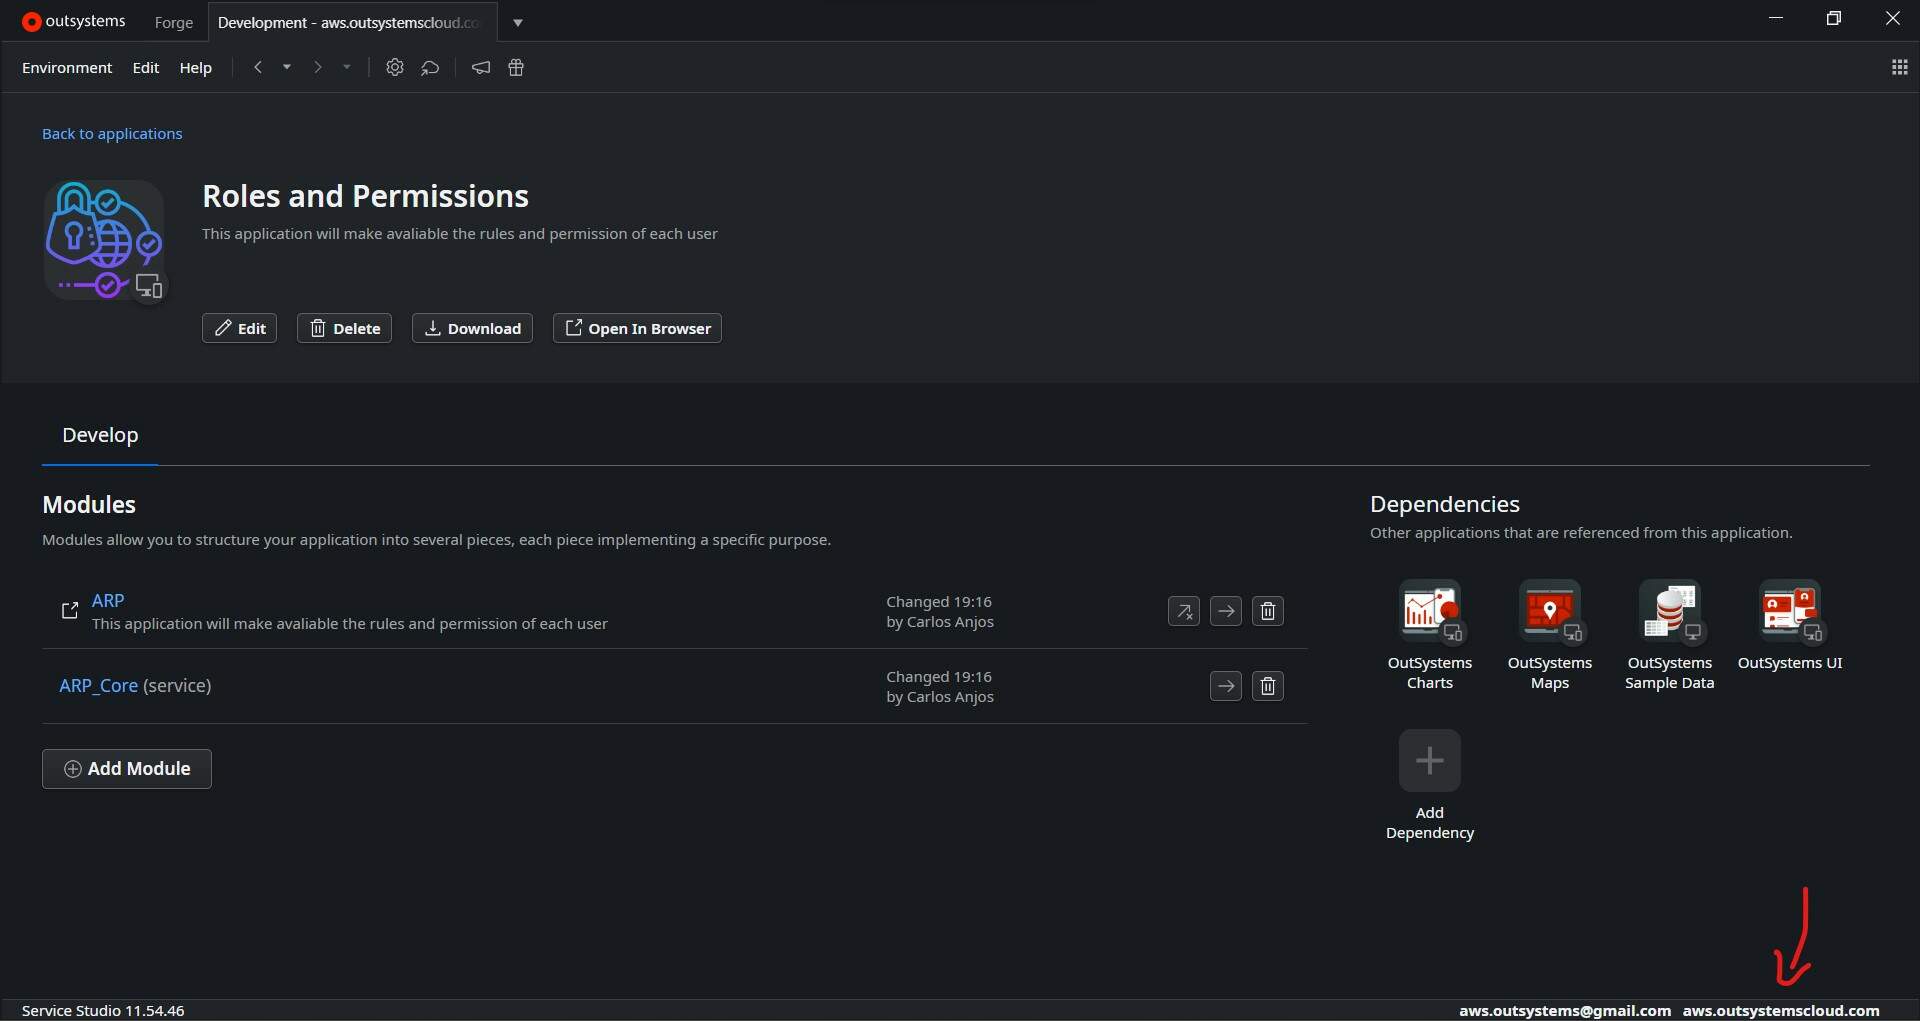
As you can see, our project has been successfully installed in the destination environment, and from now on, we can continue working on it through the new Environment.
And there? What did you think? Leave your comment here if it worked out and if you managed to migrate your project successfully. Your comment is important for me to know that content like this is useful for our followers.
#outsystems #lowcode #migration #move #ipp


